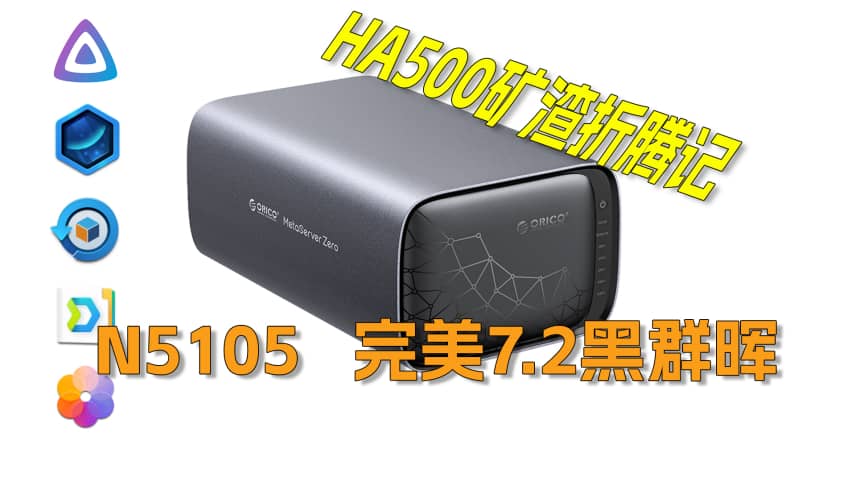
N5105 Perfect DSM 7.2 Hardware Decode on HA500
Support Content
## 1. Introduction
This video demonstrates the complete testing process of installing Xpenology 7.2 system in a lab environment on the Orico MetaServer Zero, model ha500, with an N5105 CPU.
Disclaimer: Released with DP_IT video, free to use. Any commercial activities such as resale are strictly prohibited. If someone sold this to you, please request a refund. URL: https://dpit.lib00.com
## 2. Resource Links Used in the Video
> 20250621 - Due to continuous link deletions on Baidu Pan, and the time-consuming nature of constantly replacing links, it will no longer be used. Thank you for understanding.
> Download addresses for various materials used:
Quark Cloud Drive: https://pan.quark.cn/s/54ad7a5d2098
Xunlei Cloud Drive: https://pan.xunlei.com/s/VOTGuceLyiQtX3fbds0b0-riA1?pwd=45jz
UC Cloud Drive: https://drive.uc.cn/s/356f87cd115f4
Google Drive: https://drive.google.com/drive/folders/18AuI__-tk3M8AZSOL13OUi1TDt75sFJJ
> Purchase link for screws used: https://detail.tmall.com/item.htm?id=598853940789
## 3. Command List Used in the Video
> //SSH login
ssh dp_master@192.168.1.3ssh dp_master@192.168.1.3 -p 52222
//Press Enter, then input password dpDP123
> //switch root
sudo -i
//Press Enter, then input password dpDP123
> cd ~
wget https://github.com/FOXBI/ch_cpuinfo/raw/master/Archive/ch_cpuinfo_4.2.1/ch_cpuinfo.sh
bash ch_cpuinfo.sh
> cp -f /usr/lib/udev/script/sdcard.sh /usr/lib/udev/script/sdcard.sh.bak
echo -en '#!/bin/sh\nexit 0\n' > /usr/lib/udev/script/sdcard.sh
> ls /dev/dri
> docker run --privileged --rm -it --entrypoint=/usr/bin/intel_gpu_top ghcr.io/xpenology-community/docker-intel-gpu-tools:latest
Summary Content
# N5105 Perfect DSM 7.2 Hardware Decode on HA500
## Video Overview
In this video, we follow the creator's journey of transforming a decommissioned Oracle Metaserver Zero (Model: HI500), powered by an Intel N5105 CPU, into a powerful DIY Synology NAS (Xpenology). The video provides a detailed, step-by-step guide covering everything from hardware preparation and system installation to critical configurations and performance tests. A key highlight is demonstrating how to leverage the N5105's integrated GPU for seamless hardware transcoding on DSM 7.2, making this an invaluable tutorial for anyone looking to build a high-performance NAS on a budget.
---
## ⚠️ Important Warnings: Read Before You Start!
The creator shares two crucial lessons learned the hard way. Pay close attention to these to avoid irreversible damage to your device:
### 1. Stay Away from Adhesive Remover
**NEVER** use adhesive remover on any plastic parts of the chassis. The creator used it to remove a sticker and ended up with a large, permanent white stain on the front panel near the power button, which significantly marred the appearance and could not be fully restored.
### 2. Handle the Fragile Plastic Front Panel with Care
The plastic clips connecting the front panel to the metal frame are extremely brittle. When disassembling, apply force to the inner metal frame itself, not by pulling the plastic panel, to prevent the clips from snapping.
---
## 🛠️ Preparations: Required Tools and Files
To ensure a smooth installation process, it's recommended to prepare the following items in advance:
1. **Test Hard Drive**: A 2.5" or 3.5" hard drive with all data wiped (formatted to FAT32).
2. **A Separate Computer**: For accessing web interfaces and running command-line tools.
3. **Bootloader Image**: The latest version of the RR bootloader (arpl-i18n); the video uses version `24.5.5`.
4. **WinPE Bootable USB Drive**: A bootable USB drive with **WinPE version 2.1** (this specific version is important). Copy the bootloader image file onto this drive.
5. **M3x4 Thin-Head Screws**: For mounting the hard drive. Ensure the screw head diameter is 5mm and the total length is 5mm.
6. **Quiet Fan (Recommended)**: A JIANZHUN `KD1204PFB2` (4020) fan to replace the stock PSU fan. This can reduce noise levels from 54 dB to a much quieter 35 dB.
7. **Screwdriver Set (Recommended)**: A set with anti-slip bits to avoid stripping screws during disassembly.
8. **Serial Number & MACs**: A set of a Synology serial number (SN) and two MAC addresses for DSM 7.2, which can be found online for semi-activation.
---
## 🚀 Installation and Configuration: Building Your Xpenology NAS Step-by-Step
The entire process is broken down into three main stages:
### Stage 1: Writing the Bootloader (in WinPE)
1. Install the test hard drive into a drive caddy and insert it into the machine.
2. Plug the WinPE USB drive into a rear USB 2.0 port and press `F12` during startup to boot from it.
3. Once in WinPE, open DiskGenius (DG) and identify the machine's internal 8GB eMMC storage.
4. Use DG to clone the RR bootloader image file from your USB drive to the 8GB eMMC disk.
### Stage 2: Compiling the Bootloader and Installing DSM
1. Shut down the machine, remove the USB drive, and power it back on. It will now boot from the eMMC into the arpl-i18n welcome screen.
2. On your other computer, open a web browser and navigate to the IP address provided by the arpl interface.
3. In the web configuration UI, perform the following steps:
* **Choose Model**: `SA6400`
* **Choose Version**: `7.2`
* **Configure IDs**: Enter the `CMD` menu and input your prepared SN and MAC addresses.
* **Build the Loader**: Select "Build" and wait for about 8 minutes.
* **Boot the Loader**: Once compiled, select "Boot."
4. Wait about 4 minutes, then access the new Synology setup IP address in your browser. Choose "Install from the Internet" to install DSM 7.2 and complete the initial setup prompts.
### Stage 3: System Optimization and Configuration
1. **Enable SSH**: In the Control Panel, enable the SSH service and **change the port to a custom one** (e.g., between 30000-60000). Also, set up auto-block for enhanced security.
2. **Fix CPU Display**: Log in via SSH and run a specific script to correct the CPU model information, which may not display properly by default.
3. **Install Container Manager**: From the Package Center, install Docker (which has been renamed to `Container Manager` in DSM 7.2).
4. **Verify GPU Driver**: Run a command to check if the integrated GPU is correctly loaded by the system (`/dev/dri` should be present).
---
## ✅ Feature & Performance Tests: The N5105's Transcoding Power Unleashed
The creator conducted several key tests on the newly installed system:
### Jellyfin Hardware Transcoding Test
- **Key Finding**: The N5105's integrated GPU is perfectly driven under DSM 7.2, and hardware transcoding works flawlessly!
- **Test Comparison**:
- **4K Direct Play**: CPU usage remained low.
- **4K to 720p Transcode (HW enabled)**: CPU usage stayed remarkably low while GPU usage increased, confirming that hardware transcoding was active and effective. This is a game-changer for streaming to multiple devices simultaneously.
### Synology Photos Facial Recognition Test
- **Thumbnails**: Thumbnails for photos and videos from an iPhone were generated correctly.
- **Facial Recognition**: The performance was disappointing. The system had a low success rate in identifying people from uploaded photos, indicating that significant manual tagging is still required.
### Other Functionality Tests
- **Synology Drive**: Cross-device file synchronization worked as expected.
- **Data Backup**: Backup tasks performed correctly.
- **Docker Containers**: Successfully ran popular services like PHP, Nginx, and MySQL.
---
## 🤔 Lingering Issues and Final Thoughts
### Unresolved Problem
- The front panel status LEDs do not function correctly and remain constantly lit. This likely requires additional drivers, but since it doesn't affect core functionality, the creator chose not to pursue a fix.
### The Creator's Conclusion
1. **The Xpenology Ecosystem**: Thanks to the tireless efforts of the community, Xpenology is now a very mature and stable platform that can meet the needs of most users. However, **data is priceless—always maintain multiple off-site backups**.
2. **Hardware Value**: The Metaserver Zero (HI500) is an excellent value if you can find one in good condition for under 900 CNY (approx. $125 USD). The N5105's performance is more than sufficient for a typical home NAS user. The creator also provides a cost breakdown of its components, advising viewers to be rational and avoid overpaying for this "e-waste" hardware.
In summary, this was a highly successful project that demonstrates the immense potential of the N5105 platform for running Xpenology DSM 7.2. If you're looking to build your own high-performance NAS, this video is a must-watch
Related Contents
ORICO HA500 NAS 661-Day Uptime...
Duration: 00:00 | DP
Synology DSM Tip: Easily Chang...
Duration: 00:00 | DP
Synology Office Quick Start Gu...
Duration: 00:00 | DP
View HDD SMART Info on Synolog...
Duration: 12:19 | DP
Check Real CPU Temperature via...
Duration: 08:06 | DP
Synology 7.2 Jellyfin Upgrade ...
Duration: 13:06 | DP
Docker Jellyfin Free SSL Certi...
Duration: 14:42 | DP
Docker Nginx Free SSL Certific...
Duration: 16:17 | DP
Synology NAS Quick DSM SSL Cer...
Duration: 10:50 | DP
Synology DSM Built-in Reverse ...
Duration: 03:51 | DP
Edit Files in Synology DSM Web...
Duration: 01:43 | DP
Free SSL Certificate for Synol...
Duration: 08:52 | DP
Free SSL Docker acme.sh: Wildc...
Duration: 11:10 | DP
2025 Home Network Upgrade Plan
Duration: 06:25 | DP
Synology SSH Command Line Tuto...
Duration: 05:29 | DP
Nginx Proxy Manager on Synolog...
Duration: 14:11 | DP
Free Personal AI Hub: Docker L...
Duration: 16:26 | DP
Synology DSM Change Login Port...
Duration: 01:23 | DP
Synology DSM Global Proxy Setu...
Duration: 01:36 | DP
Docker DDNS-Go: Bind IPv4/IPv6...
Duration: 09:43 | DP
Synology SMB Protocol Beginner...
Duration: 04:24 | DP
Nginx Reverse Proxy Basics for...
Duration: 12:20 | DP
HomeBox Free Speed Test Tool D...
Duration: 10:31 | DP
Synology SFTP Tutorial: Secure...
Duration: 05:12 | DPRecommended
Synology DSM Change Login Port...
01:23 | 214How to modify the login web port in Synology DSM s...

Antigravity AI Model Quota Mon...
00:00 | 4,204This video is a practical tutorial tailored for An...
Starsector 0.97 Online Ships D...
07:06 | 222During the New Year holiday, I played Starsector v...

Synology USB Copy Guide for DS...
09:57 | 221Synology Backup Package USB Copy User Guide, cover...