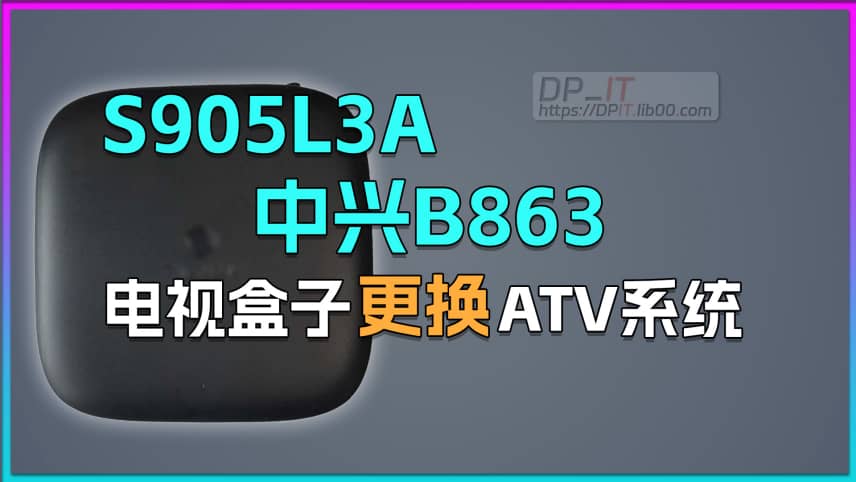
M401A TV Box S905L3A ATV System Flashing Guide
Support Content
## 1. Introduction
This video explains the steps for flashing the ATV system on the M401A Android TV box. In principle, it applies to all s905L3A devices, including preparation, flashing, boot testing, and other procedures.
Disclaimer: Released with DP_IT video, free to use. Any commercial activities such as resale are prohibited. If someone sold this to you, please request a refund. Website: https://dpit.lib00.com
## 2. Resource Links Used in the Video
> 20250621 - Due to continuous link deletions on Baidu Pan, and constant re-uploading being too time-consuming, it will no longer be used. Thank you for understanding.
> Download links for various resources used:
Quark Cloud: https://pan.quark.cn/s/697c5e3d6308
Xunlei Cloud: https://pan.xunlei.com/s/VOTGP81AADAE991seIhZn8jtA1?pwd=2wyw
UC Cloud: https://drive.uc.cn/s/f605de5c4a0c4
Google drive: https://drive.google.com/drive/folders/1b-LS_cWFsNfsauWDpWm6F_w_1K2tkD06?usp=sharing
## 3. M401a 2G Reduced Version Test Content // This version provided by viewer "吃饭ar"
### Firmware Download
> Download links for various resources used:
Quark Cloud: https://pan.quark.cn/s/a221eb782d86
Xunlei Cloud: https://pan.xunlei.com/s/VO_1UepwmkGge0Pd4blVSb63A1?pwd=jgqe
UC Cloud: https://drive.uc.cn/s/567d99d3642c4
### Message from 吃饭ar
> This is a single inductor package. I tested it yesterday and it works fine, stable. It's an officially modified system, not slimbox. Slimbox can only be used on the normal non-reduced M401A. The reduced version will have problems once installed.
> Method to determine if it's a reduced version without opening to see the motherboard - see comparison images, which serve as reference
> Comparison images

Summary Content
# M401A TV Box S905L3A ATV System Flashing Guide
## Video Overview
This comprehensive tutorial by content creator DP demonstrates how to flash Android TV 9 system onto the Magic Box M401A TV box powered by the S905L3A chipset. It's a complete step-by-step guide from preparation to completion, perfect for users looking to breathe new life into their old TV boxes.
---
## Key Content Points
### Preparation
**Software Resources:**
- Visit dpit.lib00.com and search for "401" to access relevant documentation
- Download two essential files from Quark Cloud Drive:
- USB Burning Tool v2.2.4 (flashing software)
- Android TV 9 firmware image (.img format)
**Hardware Tools:**
- HDMI shorting tool (for entering burn mode)
- Male-to-male USB cable
- Both items available on e-commerce platforms for under $2 total
### Pre-Flashing Configuration
1. **Install Flashing Tool**: Extract USB Burning Tool 2.2.4 and run the exe installer
2. **Prepare Firmware**: Fully extract the Android TV 9 image package to obtain the .img file
3. **Import Image**:
- Open the flashing tool, click "File" in the upper left
- Select "Import burning package" and choose the extracted .img file
- Wait for verification (uncheck "Verify IMG" if import is slow)
4. **Set Erase Options**: Check both "Erase" options as shown
5. Click "Start" button to put the program in ready state
### Hardware Connection Procedure
Proper connection sequence is critical:
1. **HDMI Port**: Insert the shorting tool
2. **USB Port 1**: Plug in one end of the male-to-male USB cable
3. **Computer USB Port**: Connect the other end (prefer rear panel ports; try different ports if not detected)
4. **Power Connection**: Connect the M401A power adapter
5. **Initiate Flashing**: Press the button on the box; the software will automatically detect the device and begin burning
### Flashing Process
- Progress bar will display burning status
- Wait until progress reaches 100%, showing "Burn Success"
- **Important**: Click "Stop" button to end the burning process
- Disconnect USB cable and remove shorting tool
### First Boot
Connect the box to your TV via HDMI and power cable. The first boot will display the Android TV system initialization screen.
---
## Technical Highlights
- **Chipset Platform**: S905L3A is a cost-effective Amlogic processor widely used in ISP-customized boxes
- **System Upgrade**: Replacing custom firmware with native Android TV provides better app compatibility and user experience
- **Cost Advantage**: Extremely low total cost makes old box refurbishment highly cost-effective
---
## Important Notes
- Windows system required for flashing operations
- USB port selection matters—prioritize motherboard-direct rear ports
- Always click "Stop" after burning completes before disconnecting devices
- Flashing carries risks—follow steps carefully
---
## Target Audience
- Users with idle ISP-provided TV boxes
- Enthusiasts wanting to experience Android TV system
- Tech hobbyists seeking cost-effective digital modification projects
- Users with basic understanding of firmware flashing
---
## SEO Keywords
M401A flashing guide, S905L3A firmware, Android TV installation, TV box modification, USB Burning Tool tutorial, Amlogic chipset flashing, ISP box conversion, ATV system, set-top box upgrade, custom firmware installation
---
*This tutorial is based on creator DP's hands-on experience, providing detailed flashing guidance for tech enthusiasts. Please backup data before proceeding. Flashing carries risks—proceed with caution.*
Related Contents

The Ultimate Guide to Recoveri...
Duration: 00:00 | DP
Antigravity Disable Auto-Updat...
Duration: 00:00 | DP
The Ultimate Guide to Fixing t...
Duration: 00:00 | DP
Codex Skill Beginner's Guide: ...
Duration: 00:00 | DP
The Ultimate Codex AI Cache Cl...
Duration: 00:00 | DP
Free Online Text Comparison To...
Duration: 00:00 | DP
The Ultimate Guide to Managing...
Duration: 00:00 | DP
AI Beginner's Guide: How to Se...
Duration: 00:00 | DP
Google Antigravity Account Ban...
Duration: 00:00 | DP
Antigravity Not Working? Solve...
Duration: 00:00 | DP
Antigravity Skills Beginner's ...
Duration: 00:00 | DP
The Ultimate Guide to Customiz...
Duration: 00:00 | DP
Antigravity Perfect Dark Theme...
Duration: 00:00 | DP
Antigravity Tip: Disable Autom...
Duration: 00:00 | DP
Antigravity Lag Fix: Enable Pe...
Duration: 00:00 | DP
Antigravity AI Model Quota Mon...
Duration: 00:00 | DP
Antigravity Multi-Account Swit...
Duration: 00:00 | DP
Antigravity AI IDE Tutorial: F...
Duration: 00:00 | DP
Synology DSM Tip: Easily Chang...
Duration: 00:00 | DP
View HDD SMART Info on Synolog...
Duration: 12:19 | DP
Sunshine+Moonlight+Win10 Remot...
Duration: 05:10 | DP
Claude Code Usage Statistics: ...
Duration: 03:50 | DP
Claude Code Status Bar: Instal...
Duration: 06:47 | DP
Check Real CPU Temperature via...
Duration: 08:06 | DPRecommended
ZTE B863 TV Box S905L3A ATV Sy...
05:26 | 1,126Android TV Box ZTE B863AV3.1-M2 Flashing ATV Syste...

Antigravity Update: New Free G...
00:00 | 575Antigravity has received a significant update, off...
View HDD SMART Info on Synolog...
12:19 | 702How to use the command line to check hard drive SM...
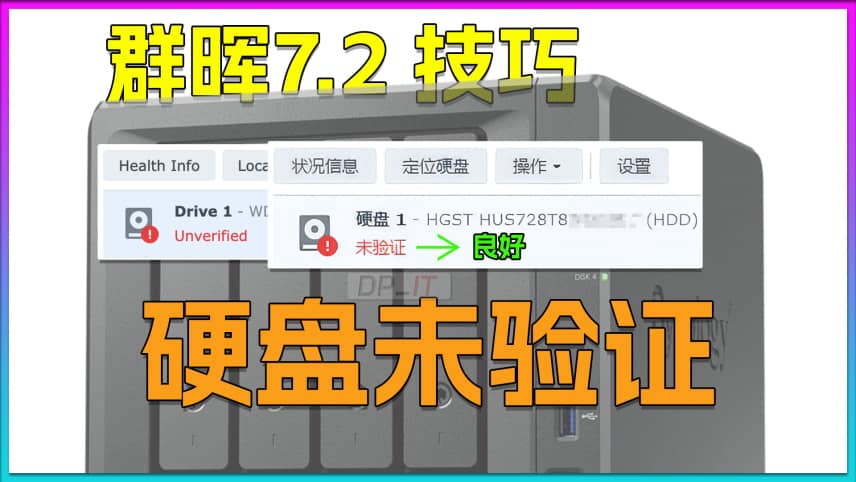
Fix Synology Drive Not Validat...
08:51 | 473Solution to the "Drive Not Verified" Issue in Syno...